
For developers wishing to explore computer vision, OpenCV is the best place to start. Installing OpenCV however is notoriously tricky. In this article we’ll step through a full build-from-source installation on Windows 10, including setting up Python and C++ development environments.
Building from Source
When installing OpenCV on Windows, we have two options. We can install pre-built binaries or perform our own build from source. The easiest way to get up and running quickly is to install the pre-built binaries. There are however a number of reasons why you may want to build from source:
- You want to be able to debug OpenCV code and step into OpenCV functions. The pre-built Windows distribution contains binary libraries for release builds only therefore, if you want to debug, you need to build from source.
- You want more control over the installation, for example which libraries and wrappers are included and which platforms are targeted.
- You want to modify the OpenCV source code in your application.
- You want to contribute to OpenCV development.
Installing the pre-built binaries is a great way to get started quickly however you will probably want to customize the install eventually as you get more familiar with what OpenCV has to offer. This article assumes you want to build from source and explains the full process on Windows 10.
Preparation
The first step is to download the source code. At the time of writing, the latest version of OpenCV is 4.2.0. The 4.2.0 source can be downloaded from OpenCV’s GitHub page. To have access to the latest OpenCV functionality, you will also want to download the contrib modules.
To build the OpenCV source code, a compiler is required. The suggested compiler for Windows is that provided by MSVC (Microsoft Visual C++). MSVC can either be installed as part of Microsoft Visual Studio or, if you don’t want the full Visual Studio install, you can just install the Visual Studio Build Tools. At the time of writing, the latest version of MSVC is version 16, which ships with Visual Studio 2019.
Unless you’re already familiar with C++, OpenCV’s Python interface is the best place to start. Regarding Python versions, the suggested version to use with OpenCV at the time of writing is Python 3.7. The more recent Python 3.8 has encountered issues with OpenCV bindings. Regarding target platforms, the default Python install available on www.python.org is x86 (32-bit). If you want to run x64 (64-bit) Python with OpenCV, the complication is that Numpy (a computational library which Python’s OpenCV bindings depend on) is only officially available in 32-bit format for Windows. The options therefore are as follows:
- Go with 32-bit Python and the official 32-bit Numpy package. This is the easiest option for getting started. Once 32-bit Python is installed, running the following command at the command prompt installs Numpy at the system level: pip3 install numpy.
- Use a 64-bit distribution of Python which includes 64-bit versions of supporting packages such as Numpy. Anaconda is the most common way of doing this. Distributions such as Anaconda are convenient as they have lots of tools readily available. The downside is you have less control over what is installed on your system and potentially many tools which you don’t need.
- Build your own 64-bit version of Numpy. This is only suggested if you’re familiar with building Python packages from source and you absolutely want to run with 64-bit Python and don’t want to work with a 3rd party distribution such as Anaconda.
To facilitate building from source, OpenCV uses CMake. The CMake tool is a free and open source utility which simplifies the build process with a graphical interface. CMake can be obtained from the downloads section of the CMake website. Be sure to add CMake to your Path during the installation process to allow it to be called from the command prompt.
Building the Binaries
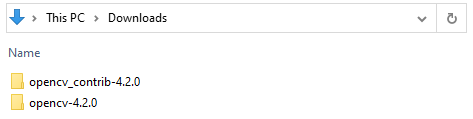
Now the preparation steps are complete, we can start the build process. Once the source files are downloaded and extracted, you should see two folders as per the image below.
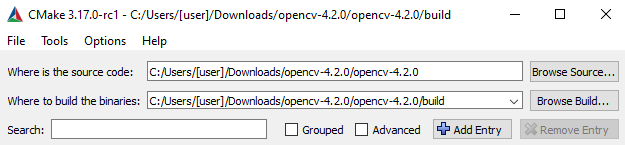
Launch the CMake utility and set the path of the source location. A build folder needs to be designated which CMake will create automatically. Be careful to use forward slashes instead of backslashes, which reflects CMake’s Linux origins.
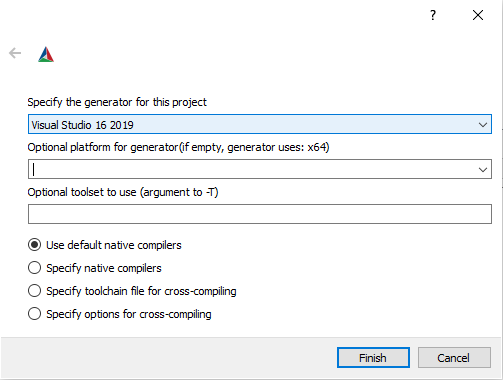
Click the ‘Configure’ button and accept the creation of the build directory. CMake will then prompt you to specify the generator. Attention needs to be paid here to x64 vs x86. Depending which architecture you’re targeting (discussed earlier in this article regarding Python), the appropriate selection needs to be made. Note that MSVC version 16 (Visual Studio 2019) defaults to x64 whilst MSVC 15 (Visual Studio 2017) defaults to x86. You may therefore need to override the default setting using the ‘Optional toolset to use’ field.
Upon clicking ‘Finish’, CMake will proceed to create the build configuration files in the designated build directory. Once the initial configuration step is complete, there are a number of build configuration changes to make in the red window of the CMake utility. The following changes are suggested:
- Set CMAKE_INSTALL_PREFIX to the folder in which you want the binaries to be installed e.g. C:/Program Files/OpenCV
- Check INSTALL_C_EXAMPLES and INSTALL_PYTHON_EXAMPLES
- To have access to the full OpenCV functionality, check OPENCV_ENABLE_NONFREE
- To include the contrib modules, set OPENCV_EXTRA_MODULES_PATH to the contrib modules source location e.g. C:\Users\[user]\Downloads\opencv_contrib-4.2.0\opencv_contrib-4.2.0\modules
- Set PYTHON3_PACKAGES_PATH to where you want the Python bindings installed – by default this will be C:/Users/[user]/AppData/Local/Programs/Python/Python37-32/Lib/site-packages
Once the above changes have been completed, click ‘Configure’ again to update the build configuration files then click ‘Generate’ to generate the build files.
Once the build files are generated, we can proceed with the build itself. Open a command prompt, navigate to the build directory which contains CMake’s output and run the following command: cmake.exe –build . –config Release –target INSTALL. The command prompt may need to be opened with administrator privileges, depending on where the binaries are being installed. This process will take approximately 15 minutes, depending on your system. When complete, the binaries will be installed in the folder indicated by the CMAKE_INSTALL_PREFIX field during CMake configuration. If you want to add debug functionality, also run the following command in the build directory: cmake.exe –build . –config Debug –target INSTALL. To complete the build process, add the location of the binaries to your Path e.g. C:\Program Files\OpenCV\x64\vc16\bin (this will depend on the location indicated by the CMAKE_INSTALL_PREFIX field during CMake configuration.
Testing the Python bindings
If the PYTHON3_PACKAGES_PATH field in CMake was set to the system site packages folder (see CMake configuration section earlier in this article), OpenCV’s Python bindings should work without any further configuration. Launch the Python interpreter, paying attention to x64 vs x86 if you have multiple versions installed, and enter ‘import cv2’. If successful, you will receive no error messages and be able to check the version.

If you have errors when trying to import cv2, the most likely causes are either x64 vs x86 compatibility or the cv2 bindings not being on Python’s path. The x64 vs x86 compatibility issues are discussed earlier in this article: Python, Numpy and the compiler need to be aligned on the same architecture. Regarding Python’s path, the cv2 module may need to be added to the PYTHONPATH environment variable if the cv2 module was installed in a location other that the system site packages folder.
Setting up a C++ development environment
On Windows, the most common C++ development environment is Microsoft Visual Studio therefore we’ll focus on Visual Studio for this article. Once the compiled binaries are correctly installed, a development environment such as Visual Studio requires the paths to the include files and library files in order to work with an external library such as OpenCV.
The first step is to create an environment variable pointing to the install directory of the compiled binaries. This simplifies the addition of paths to Visual Studio and avoids having to modify the Visual Studio project from one machine to another. For example, on my machine, I created an environment variable called OPENCVDIR, pointing to C:\Program Files\OpenCV.
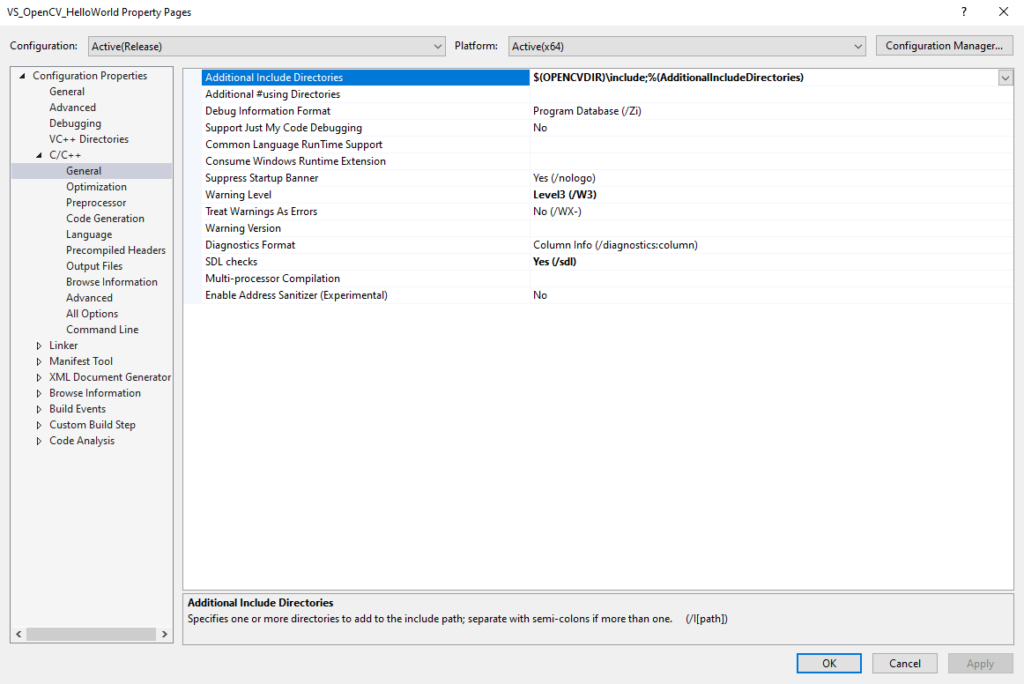
Within your Visual Studio C++ project, open the Project Properties dialogue and navigate to C/C++ > General. Under ‘Additional Include Directories’, add the environment variable created earlier, followed by the path to the include files.
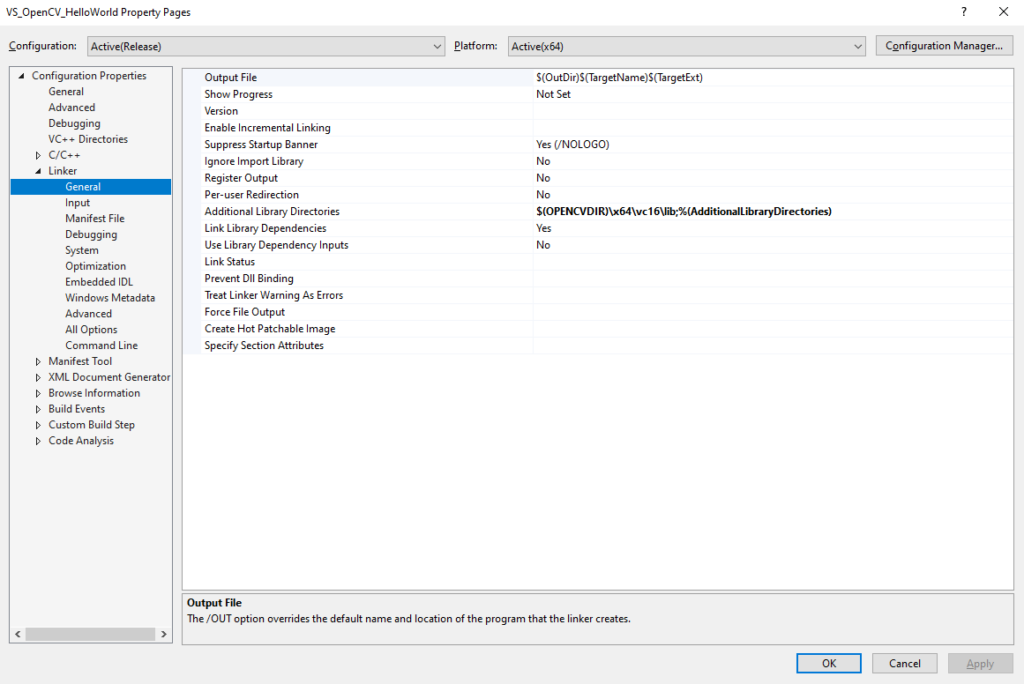
The next step is to add the path to the libraries for linking. Again within the Project Properties dialogue, navigate to Linker > General and add the path to the library files under ‘Additional Library Directories’.
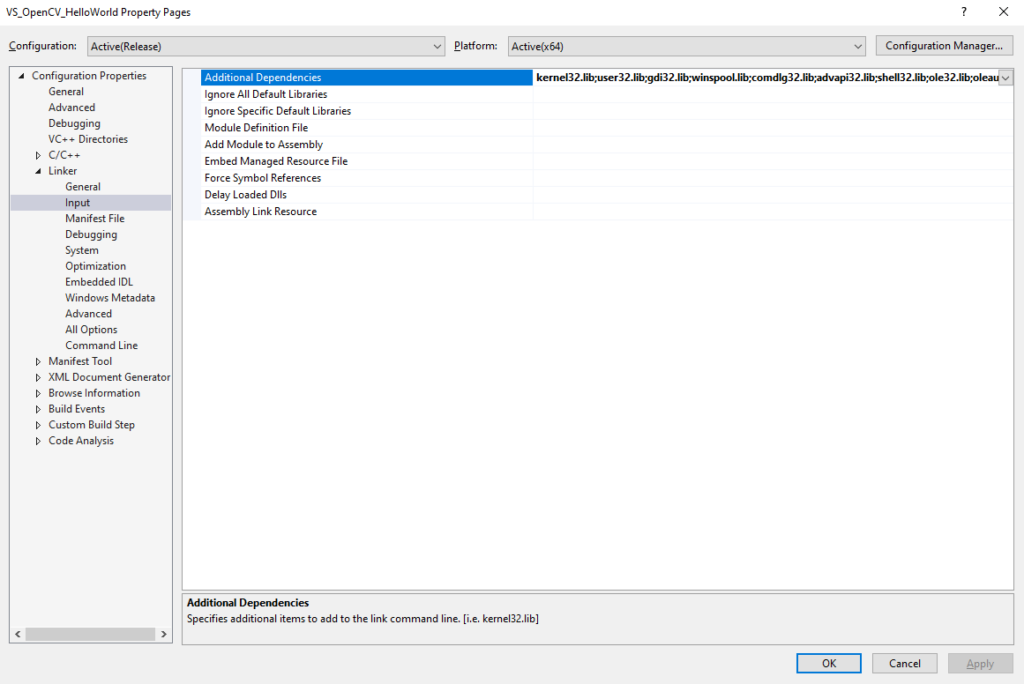
The final step is to add the specific library files to be linked under the Linker > Input section. To start with, it is suggested to add opencv_core420.lib, opencv_highgui420.lib, opencv_imgcodecs420.lib and opencv_imgproc420.lib. You can add more libraries later as you explore more of the OpenCV functionality.
Depending on whether you want to link statically or dynamically, a final step is to set the Runtime Library property within Project Properties > Configuration Properties > C/C++ > Code Generation. Your OpenCV C++ development environment is now setup and ready for building OpenCV applications.